Navigation
Description of app features designed for new installers
Login to the app
After completing the course, access to MyJABLOTRON is created for each installer. They will receive this email on defined email address together with a link to login:
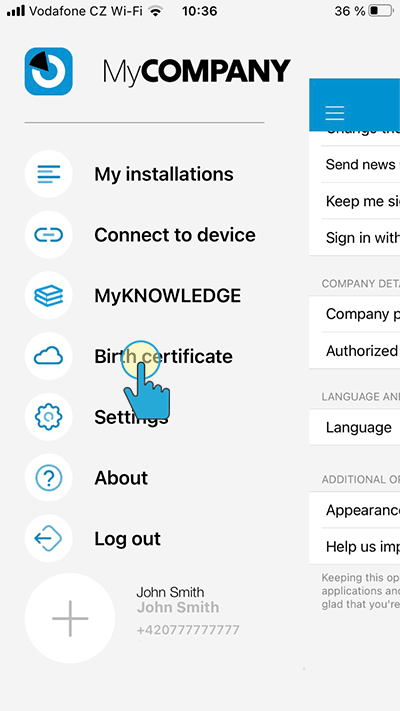
1. Parts of application
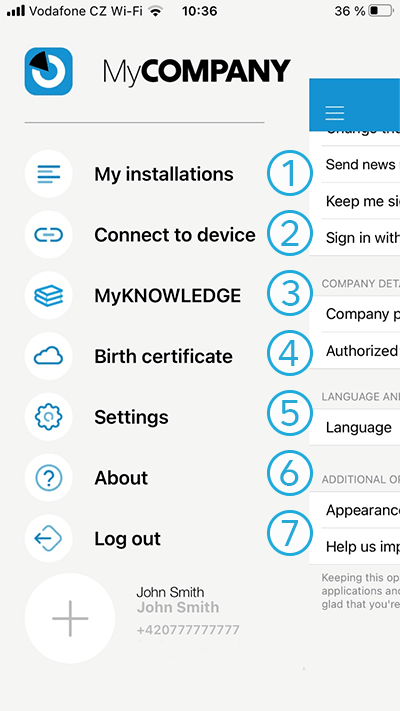
-
My installation
- Overview and management of all installations you install
-
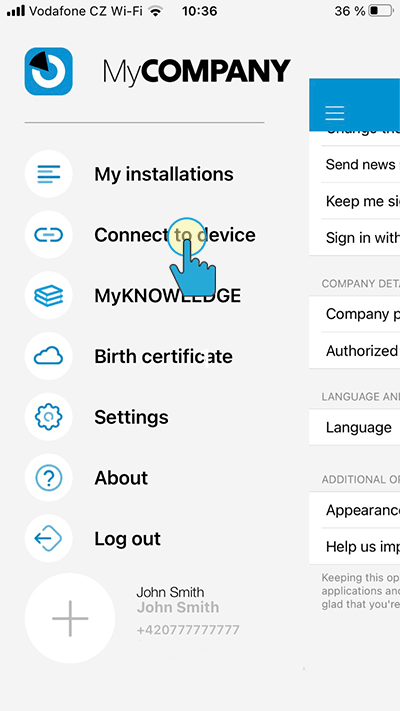
Connect to the device
- It is used to connect and configure FUTURA, VOLTA, AMBIENTA, AURA devices from Jablotron Living Technology
-
MyKNOWLEDGE
- Link to the website where you can find courses and application recommendations for installers
-
Birth certificate
- Finding out product history by scanning the barcode
-
Settings
- Set up of the application itself
-
About
- Version info, app news, access to terms and conditions
-
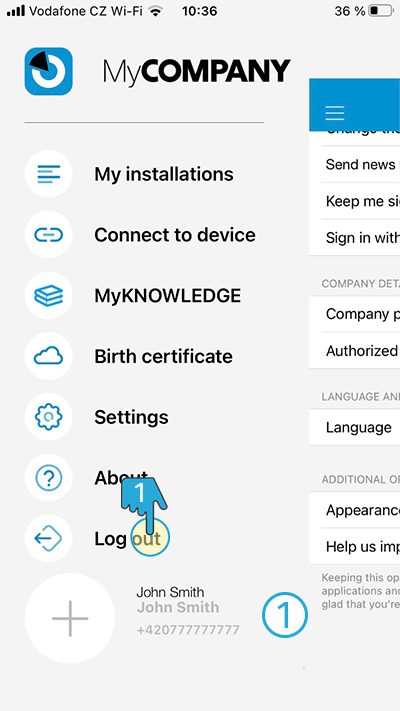
Log out
- Log out of the app
2. My installations
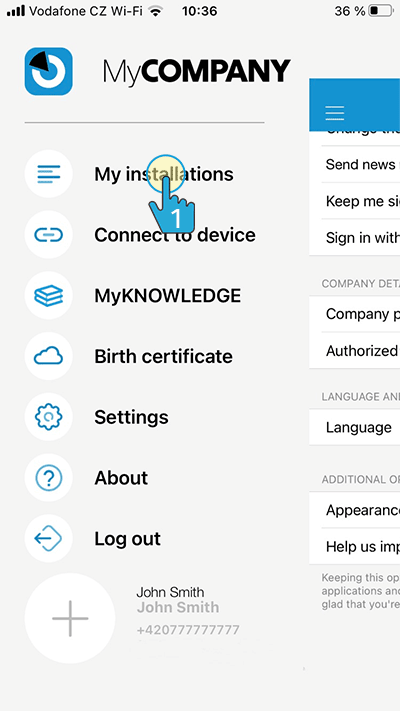
Now let’s see what’s behind the “My Installations” button – click (1 s)
If the installer is new, he sees his first installation here. If the installer has installed more than one, he sees all his installations here. And also their status:
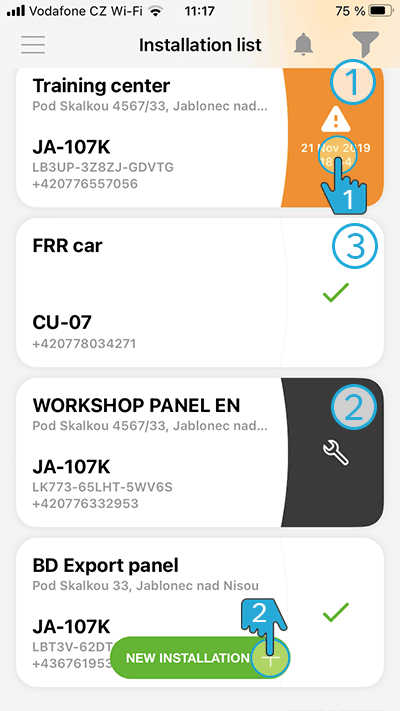
- The system has an error
- The system is in service mode
- The system is OK
 When you click on the detail, the following screen appears with a description of the fault(s).
 -
It is also possible to directly install some units, here, e.g. CU-07 car monitoring unit. The JABLOTRON 100+ system must be installed via F-Link or registered on the Cloud in the MyCOMPANY web application. The JABLOTRON Mercury system is fully configurable from the MyCOMPANY application. Video tutorial is available HERE.
2.1. Fault detail screen
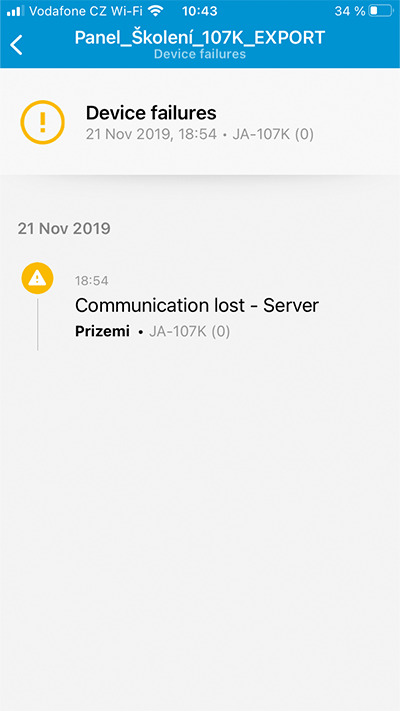
Here it is possible to read the specific fault that may be present:
- Fault
- Radio jamming
- Battery backup failure
- Peripheral battery failure
- AC power fail
- System error
- Loss of CLOUD connection
- Camera connection has been lost
2.2. Registration detail screen CU-07
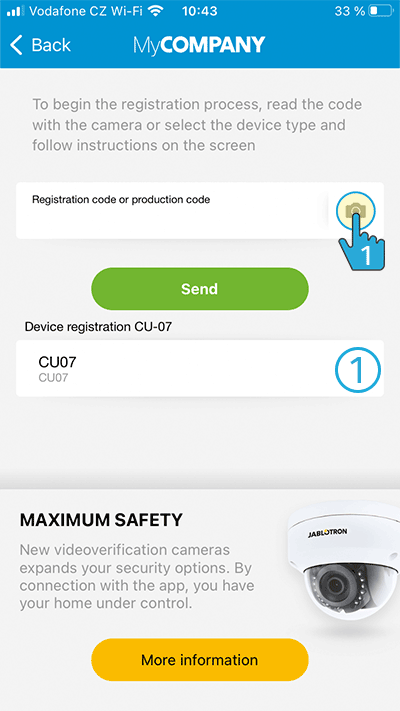
CU-07 registration option
- Here is the choice of company for registration
-
When you click on the camera icon, the camera opens and the barcode can be scanned.
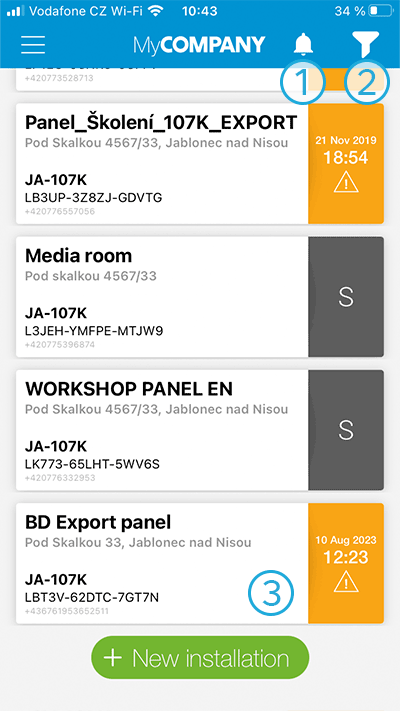
- PUSH Notification Center – screen (4)
- Option to filter in installations – will be on the next (3) screen
- Installation detail (5)
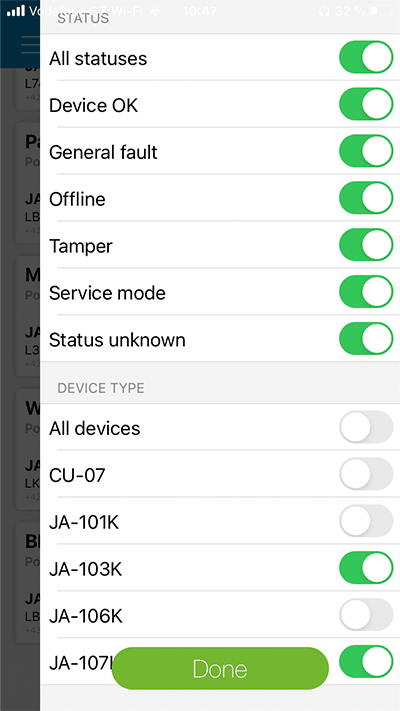
2.3. Ability to filter in installations
2.4. PUSH Notification Center
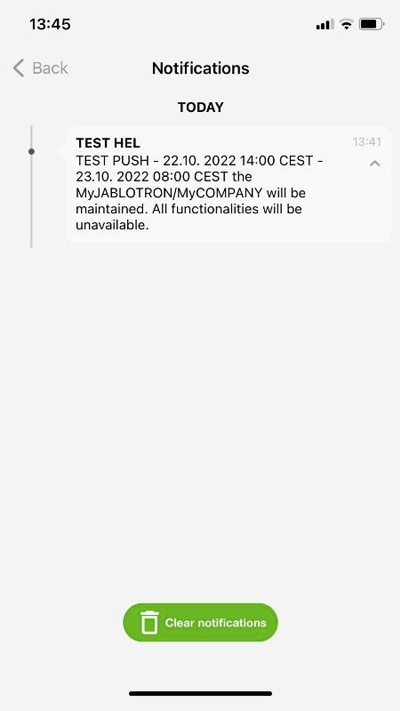
An overview of all notifications, which can be of two types – explained in more detail in the following video:
2.5. Installation detail
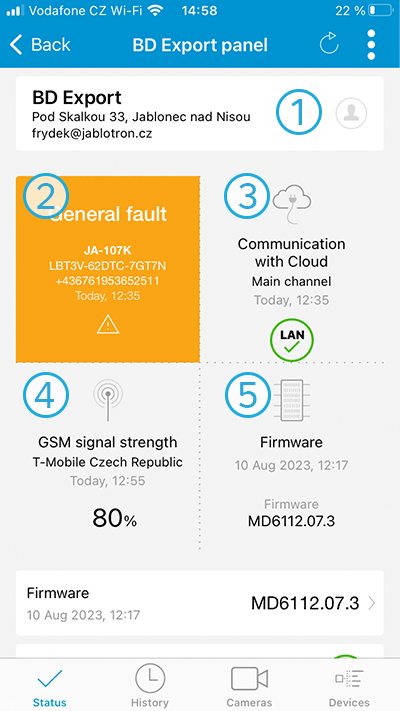
Here is a complete overview of the installation:
- Control Panel Type, Unique Reg. Key Number and phone number of the SIM card in the control panel
- General info, either that the installation is OK or as in this case, that it is an error
- Communication status to the CLOUD and info about the main communication channel, in this case LAN, but it can also be a GSM communicator
- GSM signal strength (if GSM is installed) – this shows both the operator and the signal strength in percentage
- Info about the control panel FW – FW number
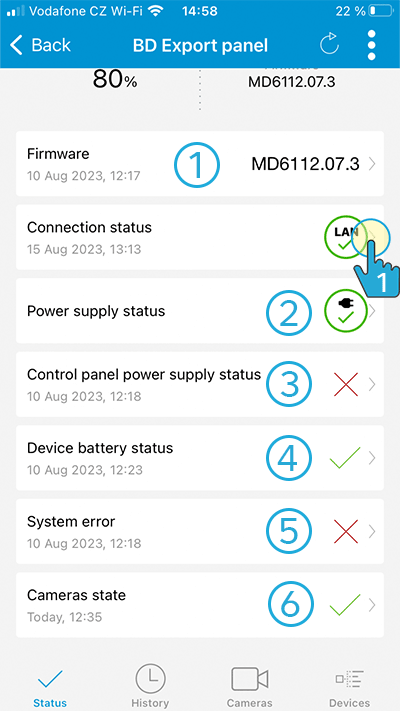
- FW number and info about when the last update was made
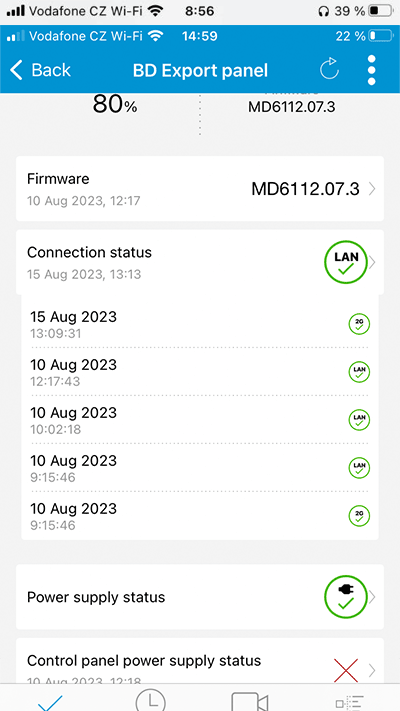
- Connection status of the control panel to CLOUD, when you click on the detail there is info about testing the connection, when the main and backup communication channel alternates -detail on the screen (6)
- AC power status of the control panel
- Status of the control panel battery
- Battery status of all wireless peripherals
- General system error
- Status of connected cameras
Status of connected cameras (6)
2.5.1. History
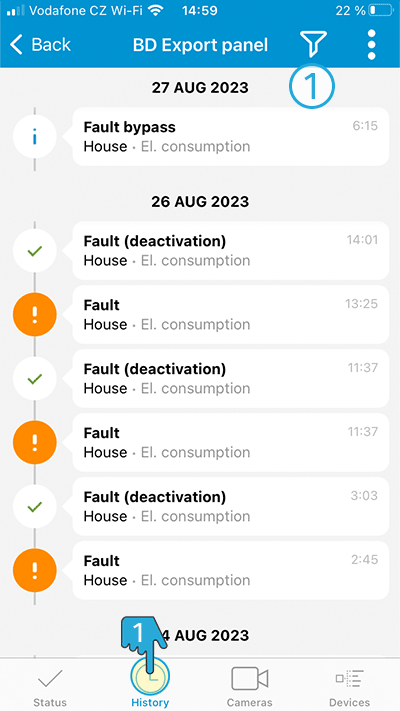
- Ability to filter between events in the history, e.g. show only “loss of connection”, etc.
-
History: option to display complete available technical information, e.g.:
- Service mode entry, faults, low peripheral battery, etc.
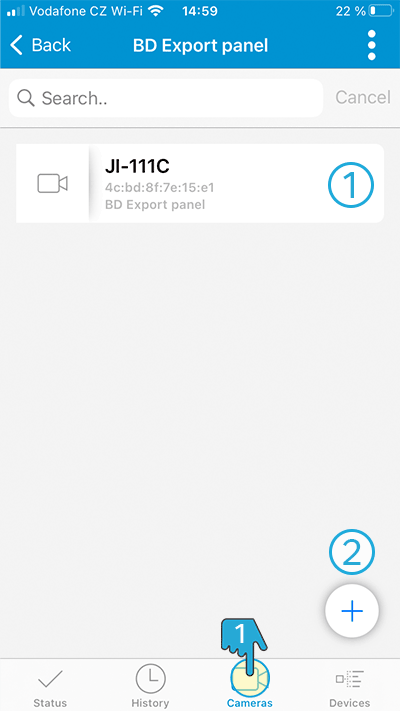
2.5.2. Cameras
-
Cameras: This tab offers 2 options:
- Manage existing cameras 2.5.2.1.
- Add new camera 2.5.2.2.
2.5.2.1. Management of an existing camera
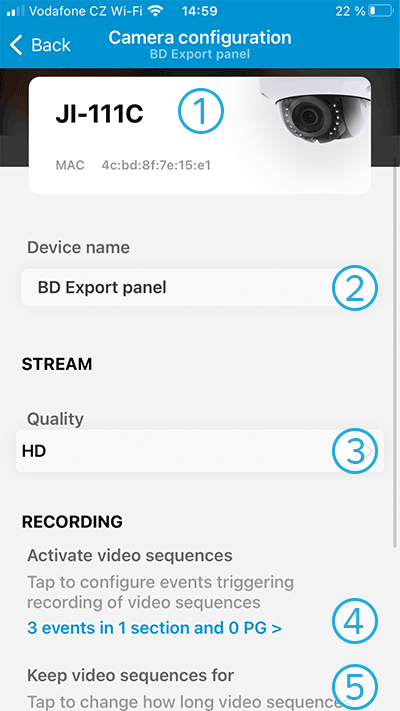
- Camera type and MAC address
- Option to name the camera, e.g.: camera garage
- Option to set the quality of the stream
- HD
- FullHD
- Option to set events during which video sequences are captured
- Option to set the deletion of video sequences: 1 – 30 days
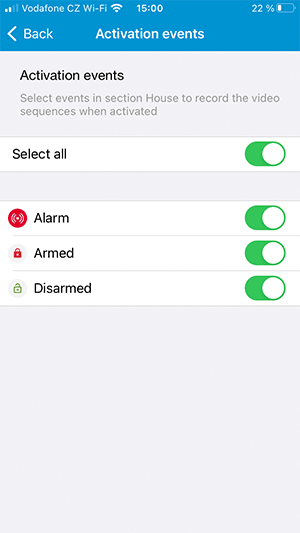
Option to set events
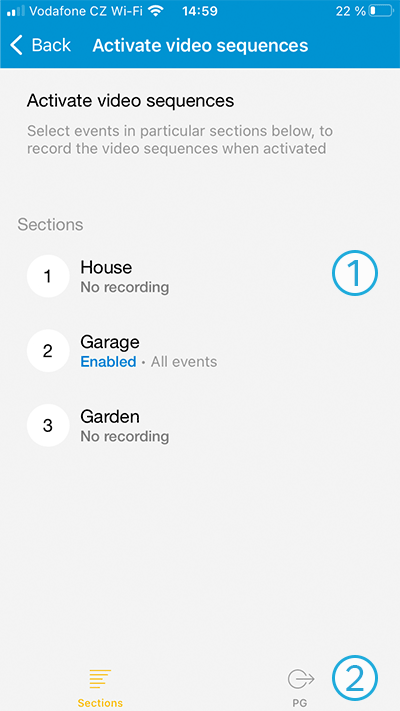
- Activation on video clips based on section status – see following slides
- The same logic applies when setting up a video sequence as a PG response (see below)
To activate video clips
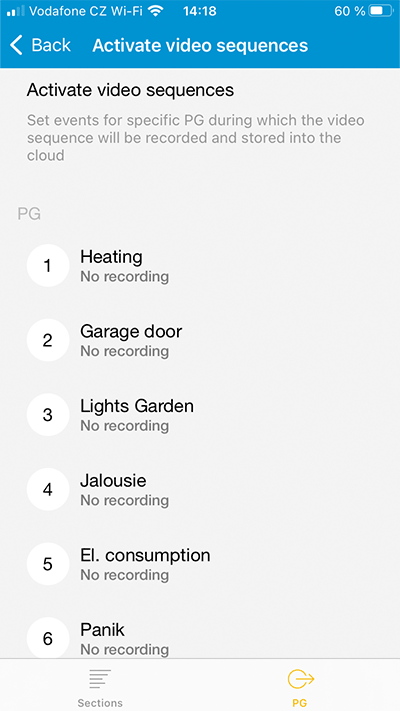
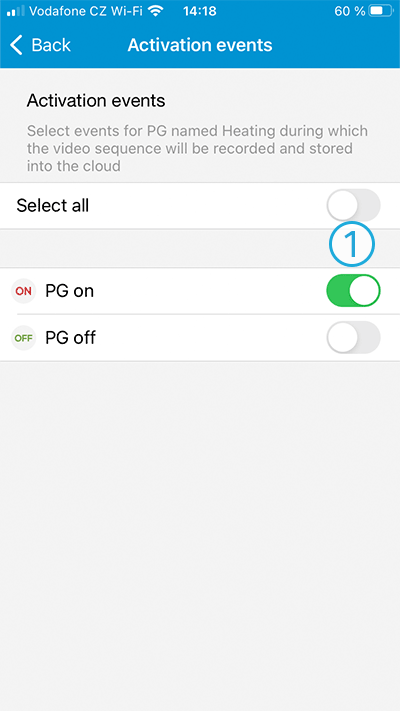
- Video sequence activation detail based on PG status
2.5.2.2. – Add new camera
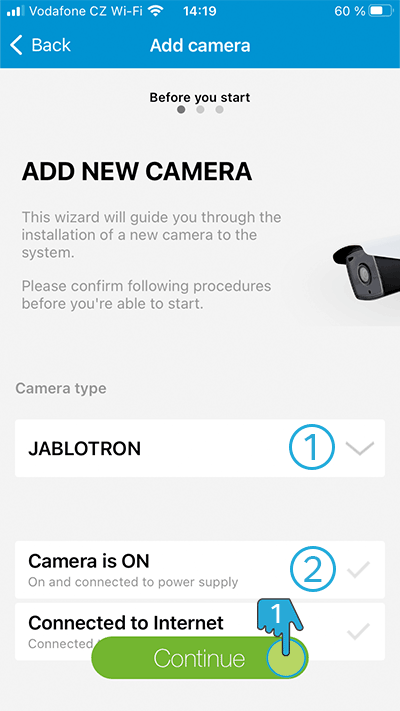
- Selecting the camera type
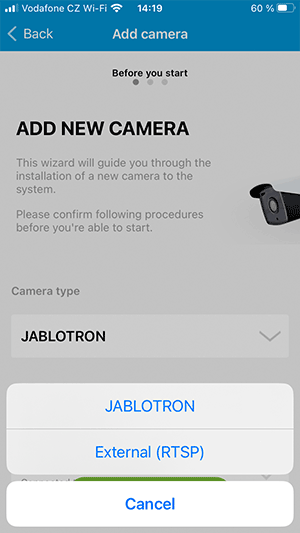
- JABLOTRON is either JI-111C or JI-112C
- RTSP is any camera supporting RTSP protocol
- Confirmation that the camera is turned on and connected to the internet
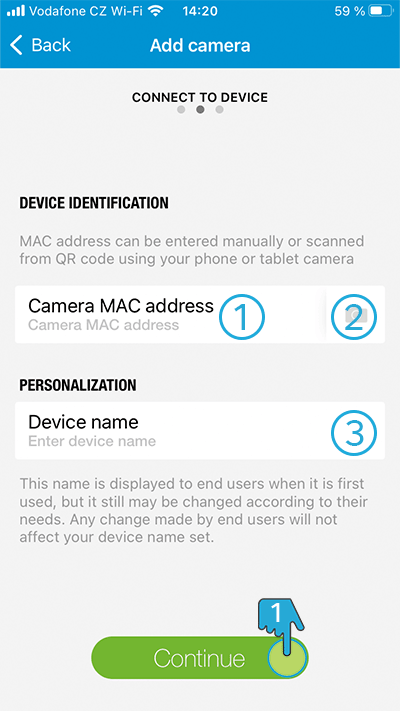
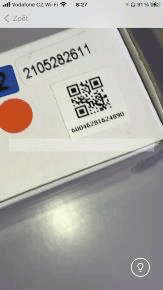
- Option to fill in the MAC address of the camera manually
- Or scan it as a QR code
- Option to name the camera
-
Completion of registration
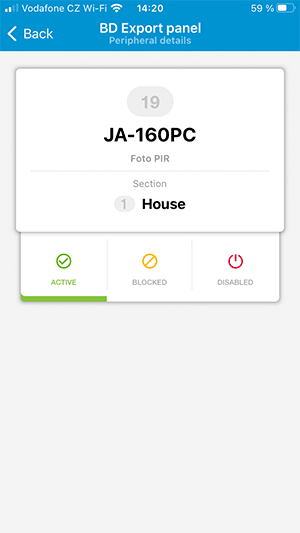
2.5.3. Peripheries
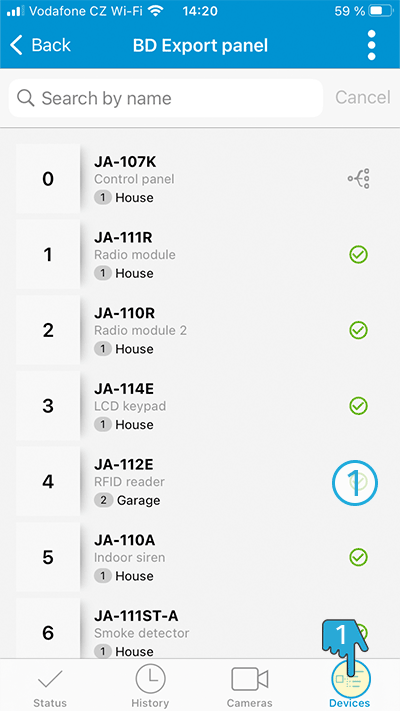
- Peripheries:
- This tab provides a complete list of peripherals that are in the installation.
- By clicking on the peripheral detail (here it does not correspond to the printscreen) it is possible to bypass these peripherals as shown in the picture:
- Off – does not send any info and does not monitor
- Blocked – sends info but does not guard
- Active – guards and sends info
2.5.4. Other settings
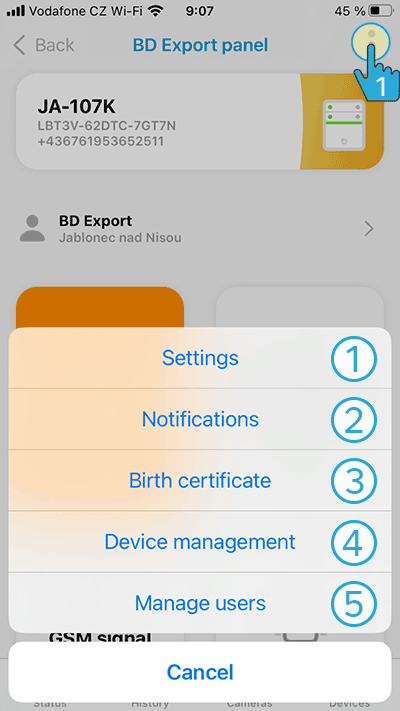
- 2.5.4.1. Settings
- 2.5.4.2. Notifications
- 2.5.4.3. Birth certificate
- 2.5.4.4. User management
- Configuration download – sending a request to the Cloud to download the current configuration from the control panel – is done automatically.
2.5.4.1. Settings
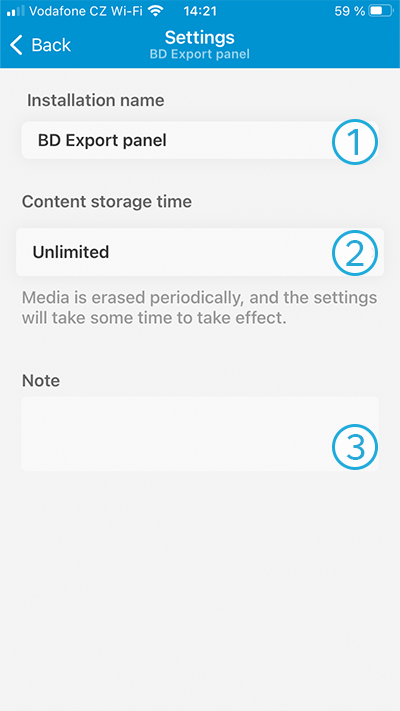
- Option to rename the installation
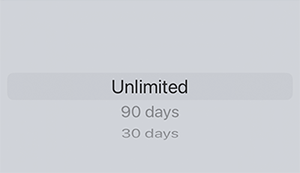
- Option to set the content saving time and that is:
- Option for the installer to write a note on the installation
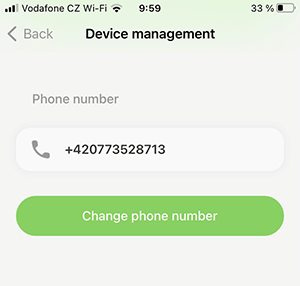
- Change the SIM card number in the control panel:
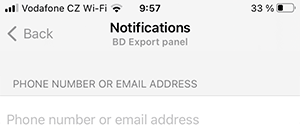
2.5.4.2. Notification
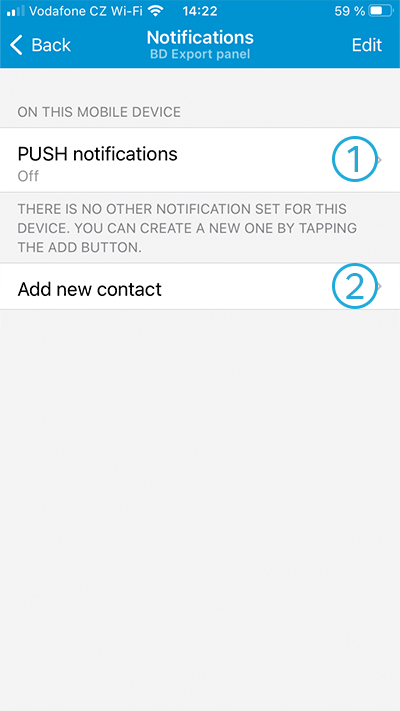
- Option to set up PUSH notifications

- Option to add a new contact, to receive PUSH notifications or emails
2.5.4.3. Birth certificate
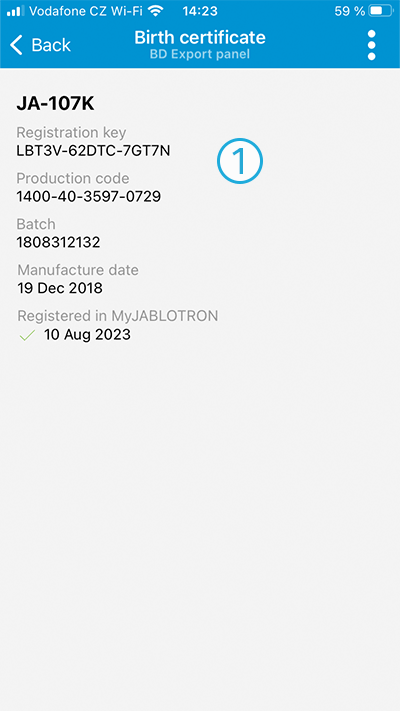
Complete display of data related to the control panel:
- Type, registration key, serial number, batch, date of manufacture and date of registration
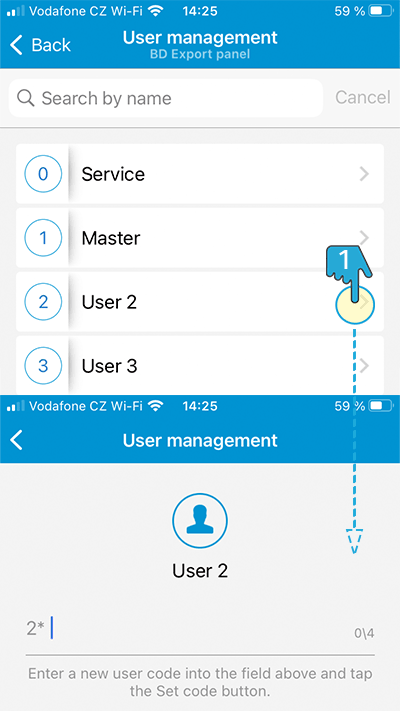
2.5.4.4. User management
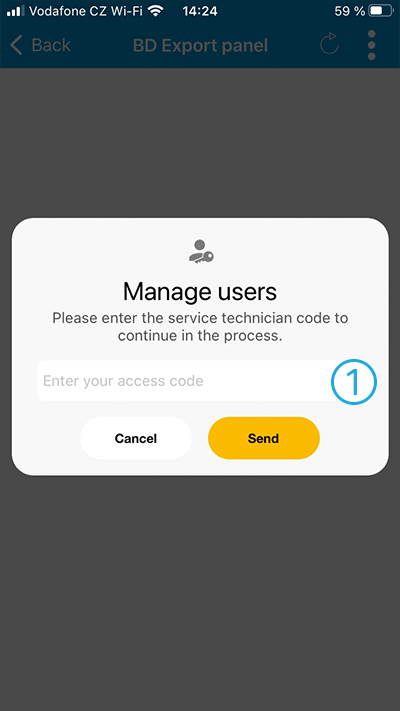
- To manage existing users, it is necessary to enter a service code and then they can be managed:
3. Connect to the device
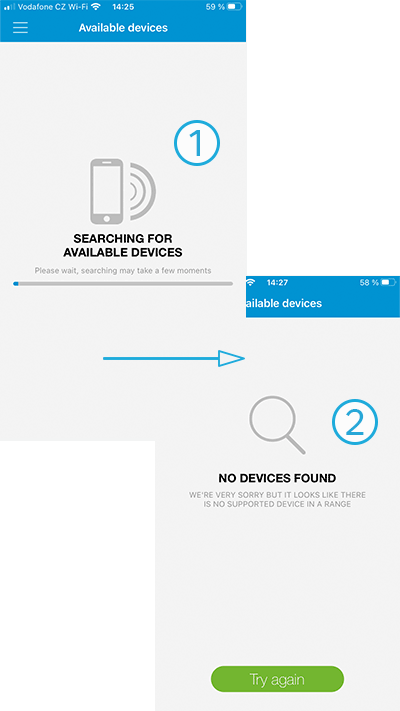
- It is used to connect and configure Jablotron Living Technology’s FUTURA, VOLTA, AMBIENTA, AURA devices.
- In case nothing is found
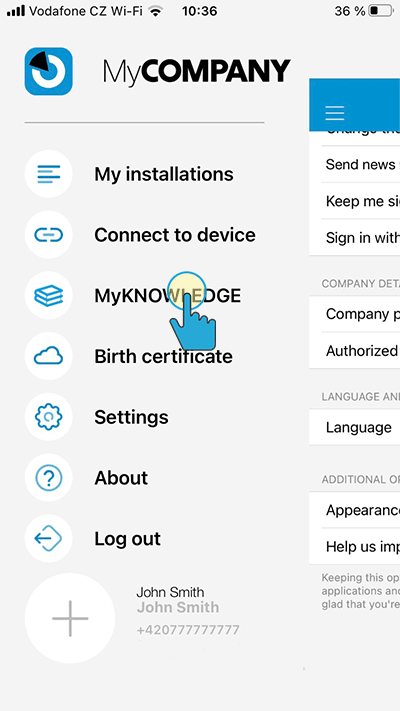
4. MyKNOWLEDGE
-
Links to the CLOUD web part of MyKNOWLEDGE https://myknowledge.jablonet.net where you can find online courses, application recommendations, etc.
5. Birth certificate

- Scan the barcode
- Complete display of data related to the control panel:
- Type, registration key, serial number, batch code, date of production and date of registration
6. Settings
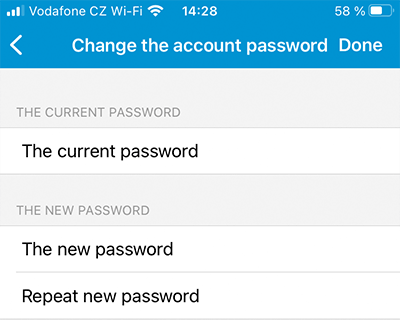
6.1. Change account password
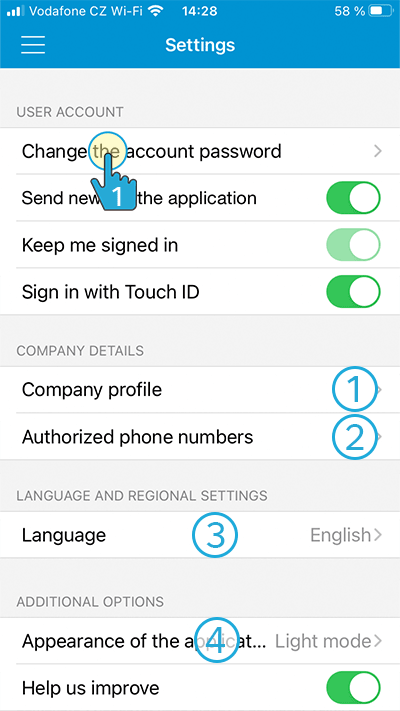
- Change account password
- 6.2. Manage company data
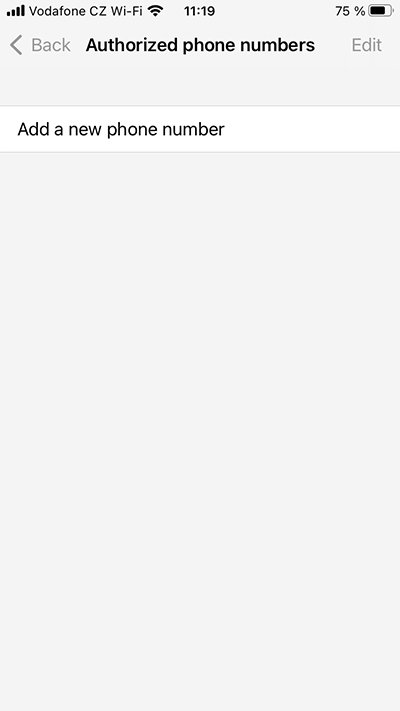
- 6.3. Authorised telephone numbers
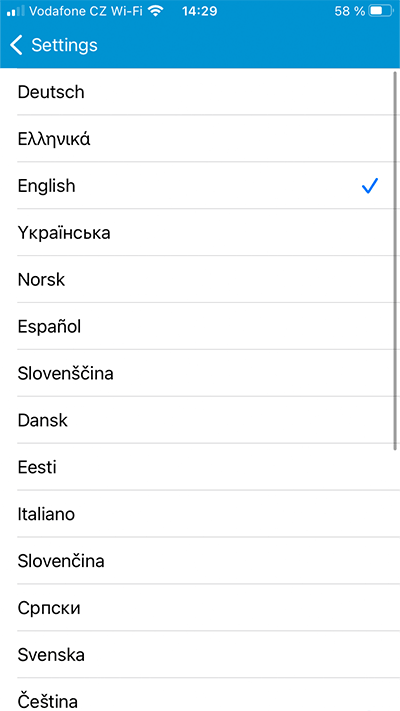
- 6.4. Language
- 6.5. Application design
6.2. Company data management
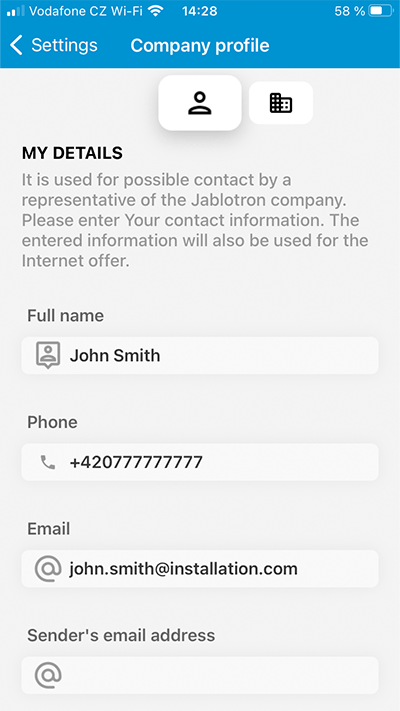
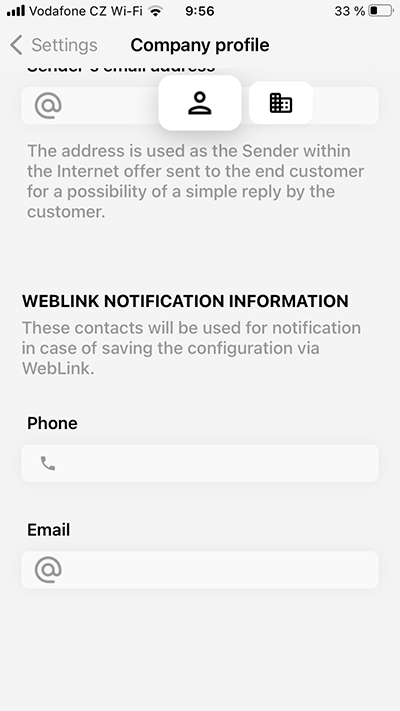
6.3. Authorised telephone numbers
6.4. Language
7. About the application
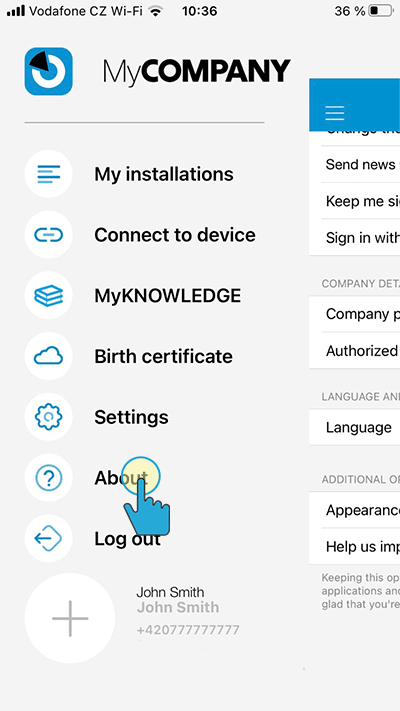
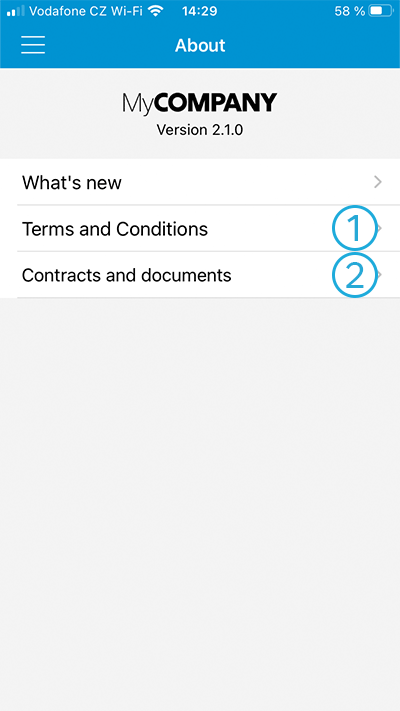
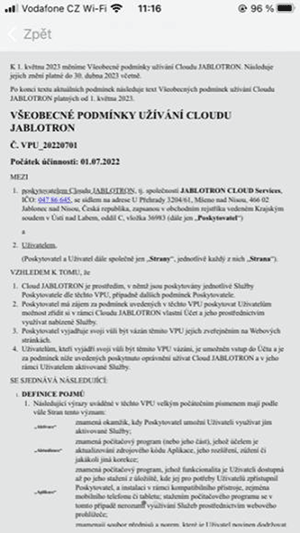
- Terms and Conditions
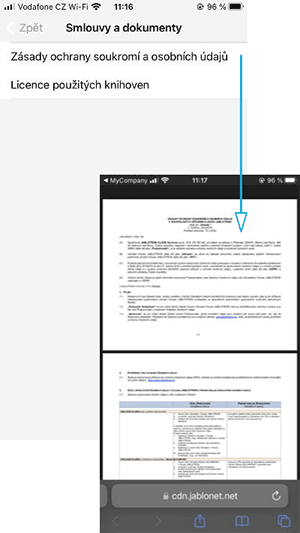
- Contracts and documents
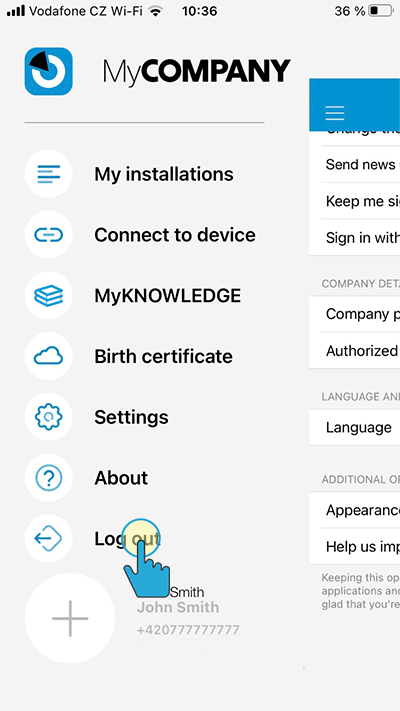
8. Log out
- Logging out of the application after which you will need to re-enter your password.
- Installer info, which is filled in the settings in section 6.2.